I'm not a fan of just adding more and more sealant in the hopes it will eventually drown the leak, so I removed the tire and set about cleaning it. I discovered that public car washes that use pressure washers do a great job getting tire sealant out. You get a completely clean and toothy tire ready for more sealant. If you can't get it to seal under pristine conditions, you're never going to get it to seal in the wild, so this is the best way to seal a slow leak.
What was left in my tire was a clear, somewhat sticky, gelatinous liquid that keep leaking out of the small puncture, but it contained no sealing beads/bits, so it was incapable of sealing the leak. This creates a dilemma because the sealing bits that plug the hole are all stuck to the tire, but to add more sealant you need to release all the pressure, and when you do this with the Conti 5000 TL it lets go of the bead, so you have old sealant stuck in the bead, and all over the inside of the tire, and you have to reseat the bead. That tire is never going to seal up well. The old sealant creates all kinds of gaps along the bead. The only solution is to thoroughly clean the tire, wheel, valve and re-tape the rim. That Conti's TL always lets go of the bead is a design problem.
Unfortunately, this time the tire came out with a lot of damage to the bead, inner casing, and sidewall, in spite of not washing the sidewall per-sec, only the inner & outer bead. Last time, at a public car wash, no damage at all. Hummm.

I should have done this before, but after letting the tire dry in the sun and inspecting it, I Googled to find how much pressure public high-pressure car washes actually use. It looks like 1,200 to 1,500 except for trucks, which can get to 2,200psi. The washer I used was borrowed from a generous friend and is rated 1,800psi, which, combined with a very narrow nozzle turned out to be too much in this case. I think if I had used the 45 degree nozzle, instead of the 25 degree, I would have ended up with a very clean but undamaged tire.
 | |
| RX the 40 degree, not the 25 degree nozzle |
Pressure washing is BY FAR the best way to remove old sealant, but do it right away before it has a chance to dry on the tire, and maybe even soak overnight in detergent soap. At any rate, I decided to take this opportunity to revisit my RX for installing the GP5000 TL tires, as this one was a new, but an older production 25mm tire and was crazy hard to get on. It took every trick in my book to get it on, but it did go on without damage, and no bead seating or leakage problems. Either Conti has some serious QA problems, or they have changed their spec, and loosened the bead somewhat. As the last two I've put on - one a 25mm, and one a 28mm - have both gone on easily, I'm guessing they changed their spec.
The tire held 90psi from an initial 110 psi after 20 hrs. I assume that was mostly from the tape seating into the spoke holes, the tire expanding somewhat overnight, and a small amount of normal leakage through porous rubber and around the bead and stem.
If you're here burning daylight trying to get out the door for a ride, I'll cut to the chase. Here's were I ended up getting this incredibly tight & difficult tire mounted. Njoy!
 | |||
| Zip-ties are like another set of hands +1 |
 |
| KoolStop tire jack played no role in finally getting the tire on |
Obviously a LOT of prying was done to get the tire bead up & over the rim's edge. PBS tire plastics are great because they have a groove that engages the tire's bead so you can push the bead up towards the rim's edge a bit before starting to pry. I tried using the KoolStop tire jack, but though it took yet another bite out of my rim's decals, I was unable to get the bead over the edge of the rim using it. The ZipTies on the other hand were priceless. They absolutely work, every time, all day long. I cut the ties loose from L2R from the valve and the tire settled into the center cavity like magic.
As per my prior post on mounting this tire, mounting the 1st bead starts at the valve, but the 2nd starts across from the valve, keeping both beads pushed down as deeply into the rim's center cavity as possible as you go, finishing up at the valve where the beads are forced outward around the valve's base. Sans the valve area, both beads were hard against the center cavity at all times. This was one tight tire! The Zip-ties keep the tire from crawling down the rim away from you all the time. A really great discovery!
Tire Cleaning Procedure:
I guess I should say right here that pressure washers and rims should never meet. You don't want to get water inside the rim, remove the LocTite on spoke heads, or get water under the airtight rim tape. You also don't want to risk damaging the bearings by blowing water and grit past the seals on the hub's bearings.So what to use? Alcohol, a tire plastic, a stiff cloth and some elbow grease.
Valve Cleaning Procedure:
Always clean the valve thoroughly before installing it again. This includes the inside of the valve body, the rubber seal, and the tapered seal that is pressed against the rim-tape. My SO bought a set of stainless steel straws (a little hard on the teeth IMHO) at BigLots and they came with a cleaning brush, but I see Amazon sells these brushes stand-alone. |
| Used valve body. What a tiny passage! |
I prefer to clean the seals with my finger tips. For the black one pictured above, use the stippled nut that holds the valve closed to turn the stalk counter-clockwise (the "Open" direction) while holding the seal between your index finger and thumb, (or whatever method you prefer) and just rub the sealant off as gently as possible. Those are some very delicate seals, so tread lightly.
 |
| New valve. White Teflon & black rubber seals showing |
Given that all the air or CO2 you'll ever put in your tires has to go through this very small passage, it should be obvious how important it is to keep both this and the stem clean. It's also the reason I had to use all High-Flow connections and couplers on my 120psi air-compressor system to insure a quick bead-seat, which it does without fail.
 |
| SS drinking straw cleaning brush |
 | |
| White plastic bead on tip is go/no-go sizing device |
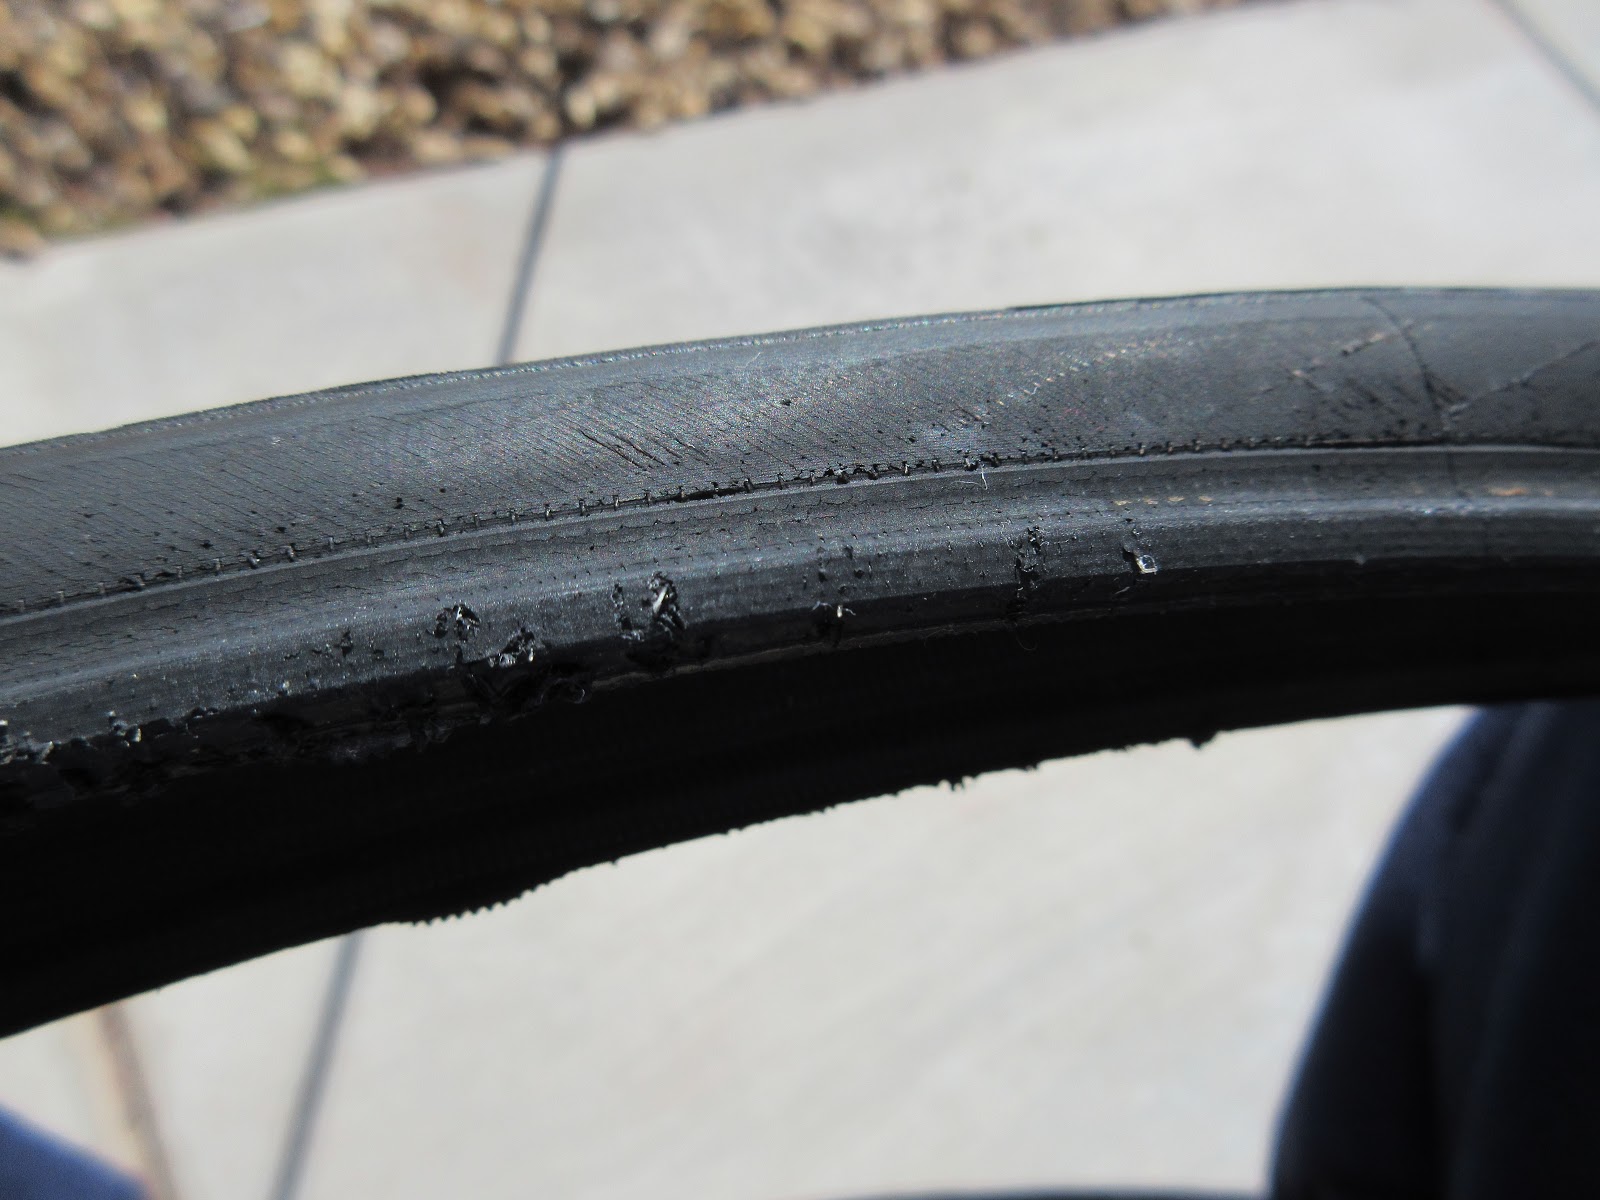
Damaged Goods:
Though I'm pretty sure this tire could be mounted and it would hold air, it has a lot of damage, especially to the bead area. The threads showing through almost everywhere on the sidewalls are disturbing, as are the strings/chords/fibers showing through on the inside of the casing. There's also quite a bit of rubber missing from the ribbed area that runs from the center to the bead on the inside of the tire casing.Those ribs are probably one reason this tire has such low rolling resistance, and give the tire such good sidewall strength even when going flat. By contrast, the inside of Schwalbe's tire looked like a golf ball, with thousands of tiny dimples.
I'm sure some of the damage you see here was done by the pressure washer, but given that Conti's TLs always let go of the bead, there's no option of injecting more sealant without having to re-seat the bead on top of old sealant, or remove the tire and clean everything thoroughly and then reinstall the tire - which I still think is the best option.
 |
| Lots of bead damage |

 |
| Sidewall and bead both pretty chewed up |

 |
| Extensive damage to the bead area |
 |
| This looks like puncture damage |
 |
| Cracked rubber and loose threads |
 |
| This could be damage, but the hole looks too clean |
 |
| Note the casing ribs |
 |
| Why are these casing threads exposed? |
 |
| Not the bead surface that engages the rim, but still... |
 |
| Sidewall chords showing around the entire tire |
 |
| Note tread-wear dimples |
I think you can see why I chose not to remount this tire. I am keeping it as a spare, but you can see, it is far from being used up based on the tread-wear dimples. My only consolation is that this tire did yeoman's work for almost a year and performed brilliantly.
I still think the Conti5kTL is the best thing going, but I would like to see some guidance from Conti about cleaning, mounting and caring for their TL tire, and hopefully, find a way to get the bead to hang on at zero pressure. To that end, I hope someone from Conti reads this report and the company responds in a helpful way. I'm a huge fan of the tire, but groping around for solutions to problems is getting tedious.
Cheers!
PS:
Thirty mile ride today and happy to report the new tires roll better, soak up bumps better, and do a better job of killing road-buzz. As much as I like the wear dimples, I'm going to set my own minimums for these tires based on visual inspection and road feel. I have no doubt a 25mm on my back wheel would wear out long before these became issues, but not on the front wheel. Very happy with my decision to replace the tire. Already ordered another 25mm as a spare. The old tire is getting tossed.
Also should report, it may be the Stan's Race Sealant, but the tire lost ZERO psi over the last 48hrs. That's a first for ANY tire for me.
1 comment:
great information, thankyou
Post a Comment